Our first “Sewing Machine Basics” course is behind us and our six diligent students are ready to begin their sewing journeys. Sandra and I look forward to seeing you in upcoming project classes and the “community sew” evenings. We’re really looking forward to those–it will be interesting to see what projects have been chosen and how everyone is progressing.
What we learned
Trying to finish a “real” sewing project on the same night as you get acquainted with a sewing machine– that’s a challenge indeed. In future ‘basics’ classes we’ll spend more time exploring the machine’s capabilities. We’ll also practice the art of the well-sewn seam. Stay tuned for a blog post on that.
We identified the major parts of a sewing machine:
- hand wheel
- stitch-length regulator
- thread uptake lever
- tension guide (disks) and regulator,
- reverse button or lever
- presser foot and presser foot lever
- needle and needle positioning with the hand wheel
- feed dogs
- how to wind a bobbin
- how to thread a bobbin, insert a bobbin case (if front-loading) or drop-in bobbin
- how to thread the top of the machine and how to thread and insert the bobbin .
We also sewed our first seams, learned how to start and stop at a notch (or line, or edge), backstitch (also called
backtack), pivot at a corner, and sew down a folded edge. That A LOT for one evening. So do practice at home!
Read the manual
As a beginner sewist, your at-home instructor is your user manual. If you don’t have one for your home machine, try doing a google search using the terms “user manual” followed by the make / model of your machine. Manuals for most recent makes and models are available online for download as a pdf.
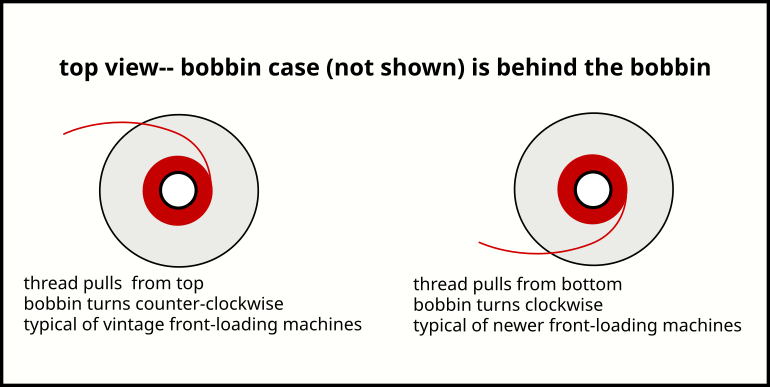
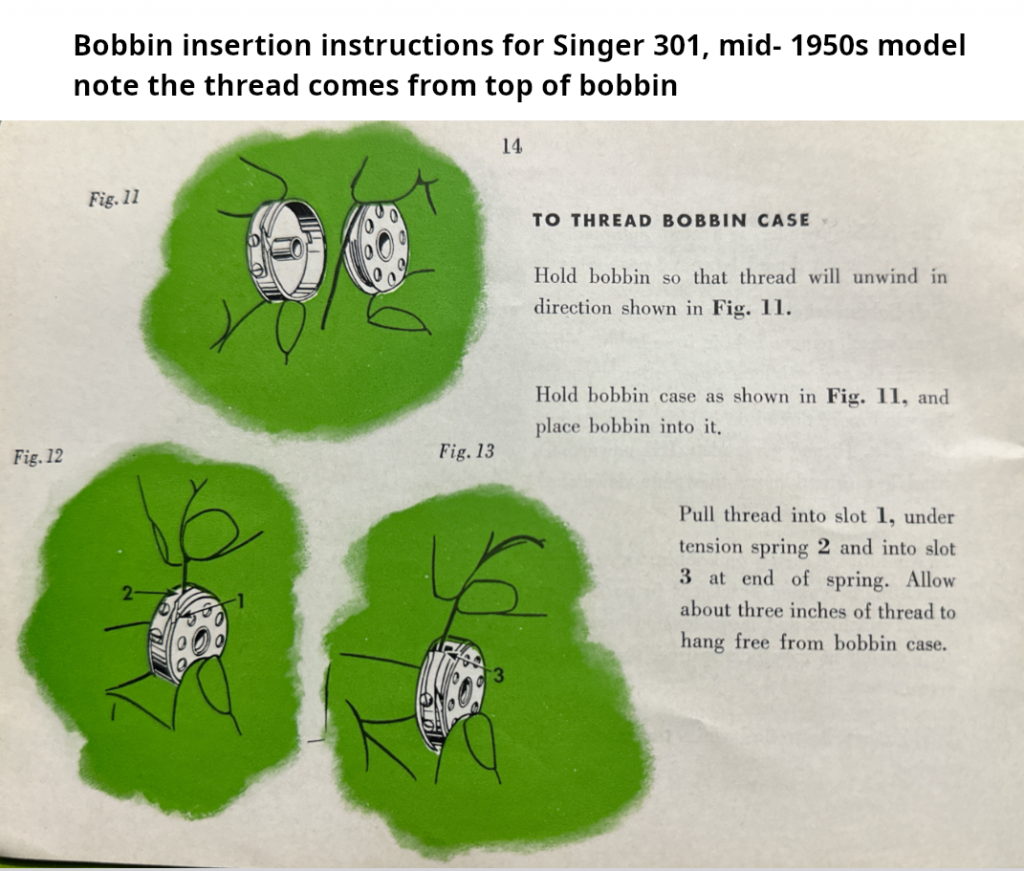
Even experienced sewists should refer to the users manual. Here’s why, with a personal example. Sewing machine manufacturers change the design of their machines. I learned to sew on my mother’s Singer 301, a model produced in the 1950s and 60s. It was state-of-the art in its time and is sought by vintage machine enthusiasts who still use it and value its robust functionality. The front-load bobbin of the 301, like most older machines, is quite different than most modern machines. I learned (from my grandmother) to insert the bobbin into the metal bobbin case with the thread pulling from the top, so the bobbin turns counter-clockwise, as shown in the screenshot below. Just recently I confirmed, by looking at the manual (via a Facebook “fan” group dedicated to the Singer 301) that I had indeed learned the “right” way to do it. Interesting, a few years ago I owned a classic Bernina 950 semi-industrial. It, too, instructed users to load the bobbin with the thread pulling from the top.
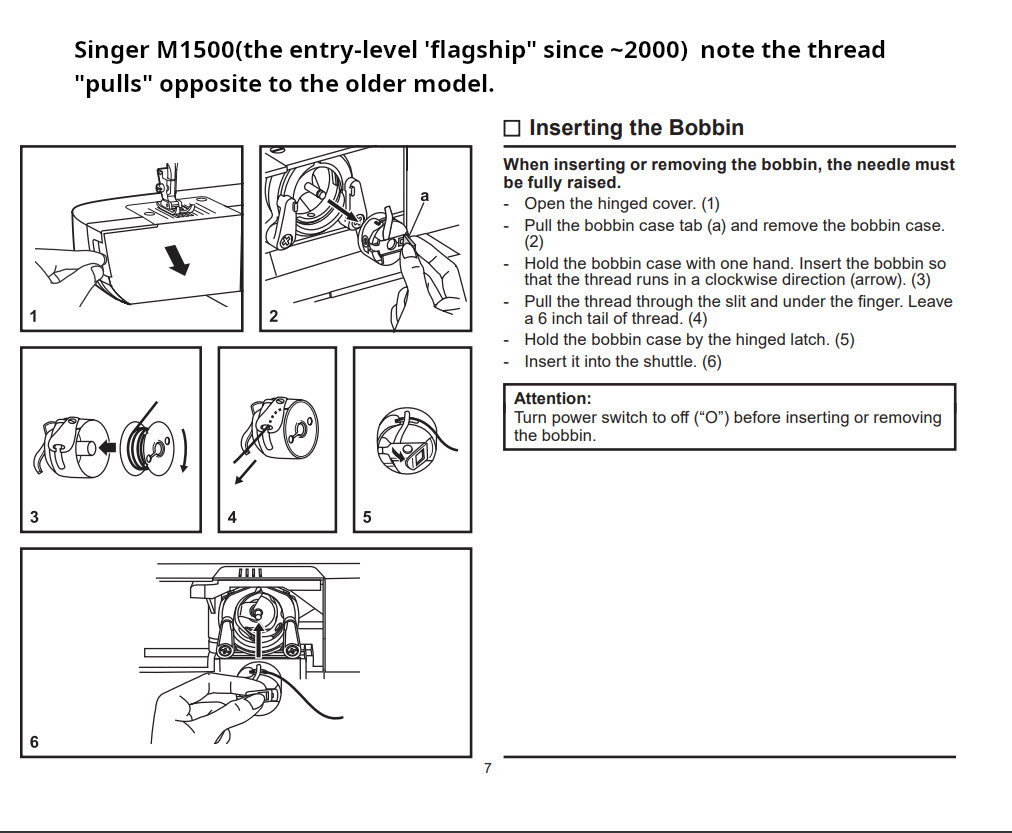
Contemporary machines, however, can be different. I have looked at only a few examples of modern front-loading bobbins, but every one of them specifies that the thread should come from the bottom of the bobbin. If you thread your contemporary machine in the old way, it will still work but you may have to adjust the top-thread tension. For reliable performance, be sure to read the manual for the correct bobbin insertion for your machine’s make and model.